Return to Index
Season 1 (2008): Sky's the Limit!
This part of the site is where I am going to put my Rock Climbing related entries. Improvement in climbing requires concentration, physical and mental strength as well as dedication. As I improve and grow as a climber, I will post various routes, stories and pictures here (videos too once I learn how...).
Here are a few informational resources:
Route Grading Scale and Comparison Chart
Rock Climbing Glossary
Climbing Routes and Information
More Routes
Climbing News
Rankings and Climber Bios
Back Story...
Outside of my childhood, I first got involved with climbing in my senior year of college. I knew immediately that it was something I wanted to be a part of for the remainder of my life. I tried to go three or four times per week for the semester, and improved from a beginner 5.7 climber to an intermediate 5.10c climber over the course of a half year. My last few weeks were spent working on a 5.11a that I was unable to send before graduating. I had planned to get back into climbing ever since, but with the exception of a few trips to Devil's Lake and some sparse indoor climbing in Rochester, I never had the chance. This all changed when I moved to Pasadena, which not only has a rock climbing gym within a few miles, but is also only two hours from one of the most famous rock climbing locations in the world, Joshua Tree.
The Arc
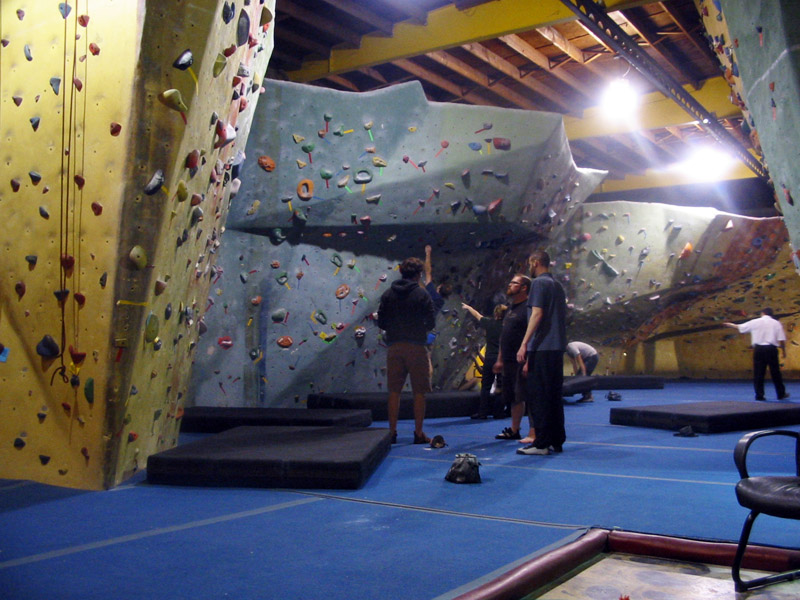
The name of the gym in question is 'The Arc' which alludes to the fact that it's in Arcadia, about 6 miles from my apartment. Here's a typical day at the Arc:
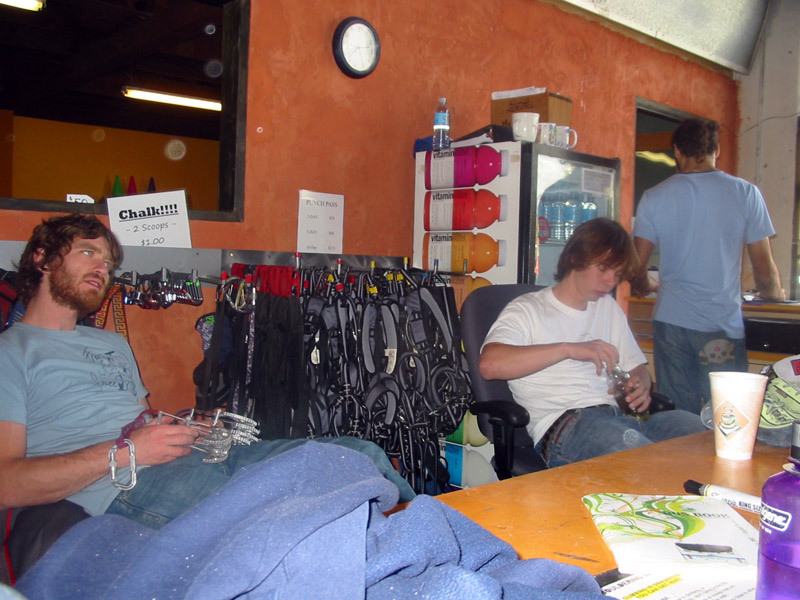
And here are the two guys that are working the counter the most often. The one on the left is Joe. He helped Colin and I get our memberships:
Colin and I began going to the Arc as often as possible. When we started I was barely able to complete some V1's and Colin quickly caught up to me. Since we were at about the same level, we were able to push each other, and it was a lot of fun. We started with horrible endurance, and were frequently having issues with our fingers, but we were loving it. We spent the first month or so working on all of the V1's in the gym. At the time, the V2's were all a bit over our heads.
Joshua Tree #1
Our first time climbing outdoors was at Joshua Tree when Colin and I went with the big troup organized by James. The trip consisted mostly of boulder problems around Ryan Campground and Ryan Mountain.
Let's Get It V0

This boulder sits among amidst the campsites and is covered with great routes. Let's Get It is a solid traverse route with a challenging top out. Colin and I worked on it for about 20 minutes before linking the traverse moves. The crux is just above the crash pad in the picture, where there's a gap in the footholds on the upper traverse section before the top out. This will go down as a C-Colin C-Classic.
And Then What?! V0

This route is a straightforward face climb that was covered in chalk when Colin and I stumbled upon it. It's a jibby, balancy route that has a committing finish to a small black knob. The secret is aggressive foot moves.
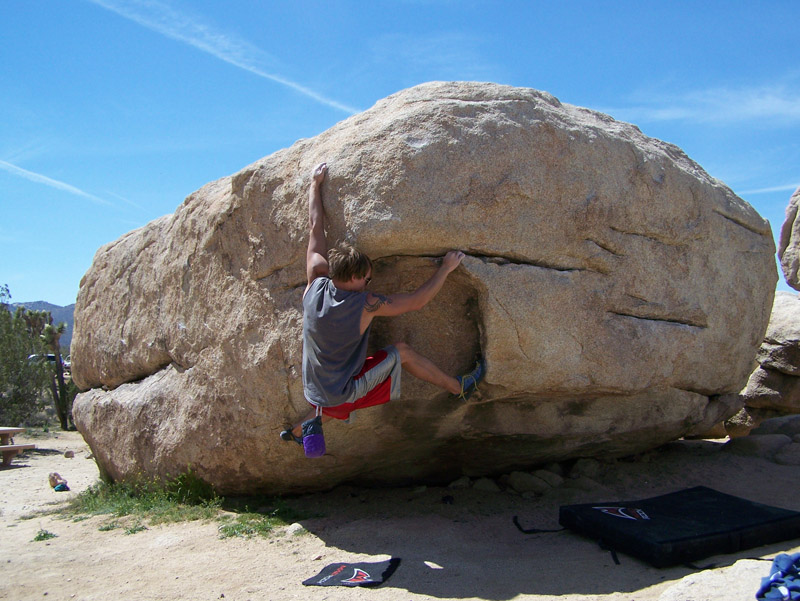
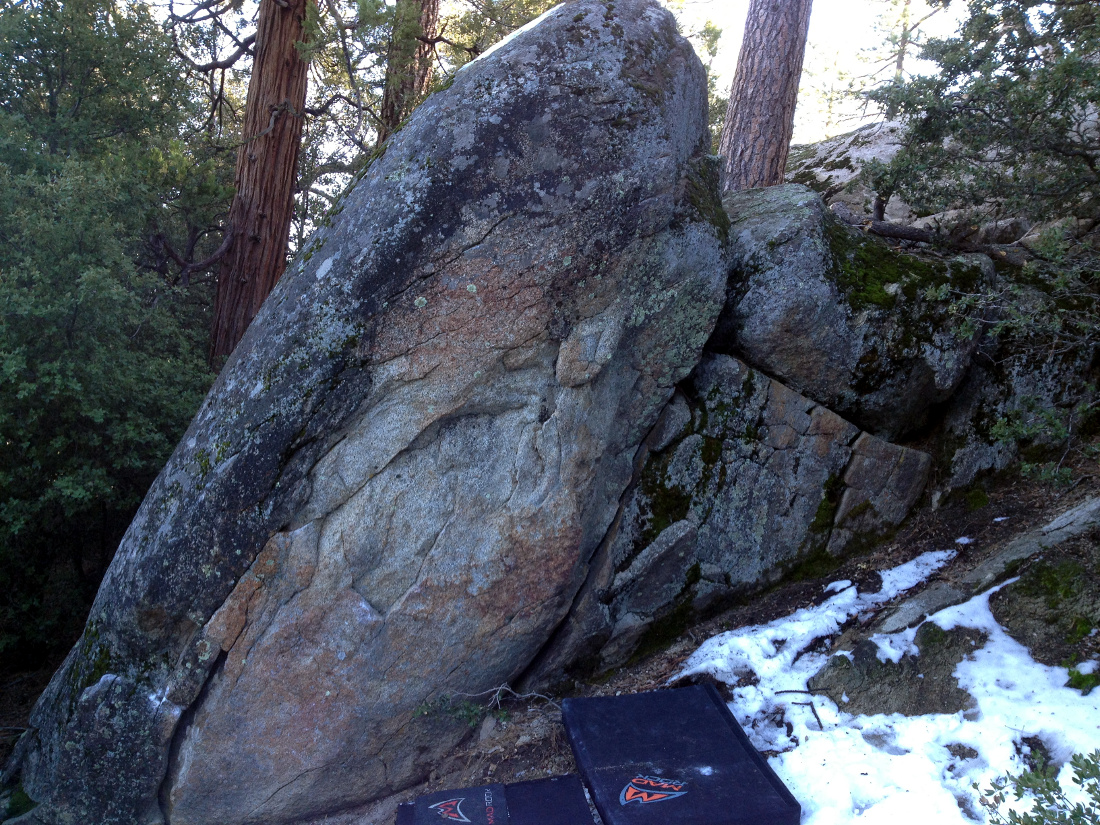
Sky's The Limit V0

Colin and I were the first people ever to climb this route, which we found near the Ryan Mountain Trail. As a result, the holds were all very chossy and needed to be brushed with a small rock. We weren't sure at first if the route was possible without the top crack, but applying the jib moves that we learned from 'And Then What?!', we slowly realized that it was. The crux is a massive foot move from the right side to the left followed by a grab on the arete. Here's Colin sticking the crux move:

Hahaaaaaaaa... V0- R

This dangerous route near Sky's the Limit was very enticing just because it looked 'doable'. However, once on the route, it was obviously too tall and poorly protected. The downclimb on the backside is also dangerous. Do not attempt.
Stoney Point #1
My first time at Stoney Point was with Rafaela, and we were able to get a better sense of the place in our short time there. When I returned with Colin, we were ready to hit the rocks. We ended up working on several routes on a boulder called Carousel Rock.
Carousel Rock Routes V0

The first route is the longest and best. We tentatively named it Krunk's Traverse. It starts with some jibby balance moves up to the crack, which provides good holds for the traverse to the right, and eventually the top out. Route 5 utilizes the obvious slopers to directly climb the rock. I climbed 1,2,3 and 5. When I returned again with Kent, I had some beta from a website and we attempted two established Stoney Point routes.
Three Pigs V0+

This route kind of pisses me off. It's all based on these three vertical pinscars that feel awful and like to tear the skin off your pinky finger. Also, the route has been done so many times that the pigs are very smooth. This is considered a classic at Stoney Point, however, and both Kent and I managed to complete it after some complaining.
Southwest Carousel V0
Back to Carousel rock, this was one of the routes I missed on the previous visit. It took me about an hour to figure out the sequence on this route, and I was exhausted at the time that I made the ascent.
Update at The Arc
After two months of climbing at the Arc I had made some very substantial progress. The first non-V1 that I climbed was an easy V3 (?!?) on 3/13/08 that was a series of slopers and dynamic moves. It's the orange one in this picture:

Once you learn how the holds work and figure out the final dyno, the entire route becomes pretty easy. The very bottom sit-start is a bit tricky though. A week and a half later on 3/24/08 I sent my first V2. It's the blue one in this picture:

The crux move on this route is definetely sticking hold #6 without falling off. Once you stay on though, #7 is a jug and the finish is easy. At around this time, Colin moved out and our new roommate Ivan moved in. Ivan is a V3/4 climber and he had an immediate impact on my climbing. On 4/1/08 I climbed my second and third V2's:

The red one in this picture is pretty straightforward. It's mostly crimpers. To top it off, I just skip hold #8 and dyno for the end. The green route is a bit more interesting. The move up to hold #2 is easy, and then you throw for #3. At this point you heel hook your left foot on #1 and put everything you have into a dynamic move for #4. Once you have 4 and 5, you readjust and make a long static balance move to number 6. Once you have it, the rest is easy.
Joshua Tree #2
On the second trip to Joshua Tree, Rafaela and I revisited a number of boulder problems and discovered some new ones. We also took some videos that I will be posting once I learn how. Here's Rafaela on Let's Get It:
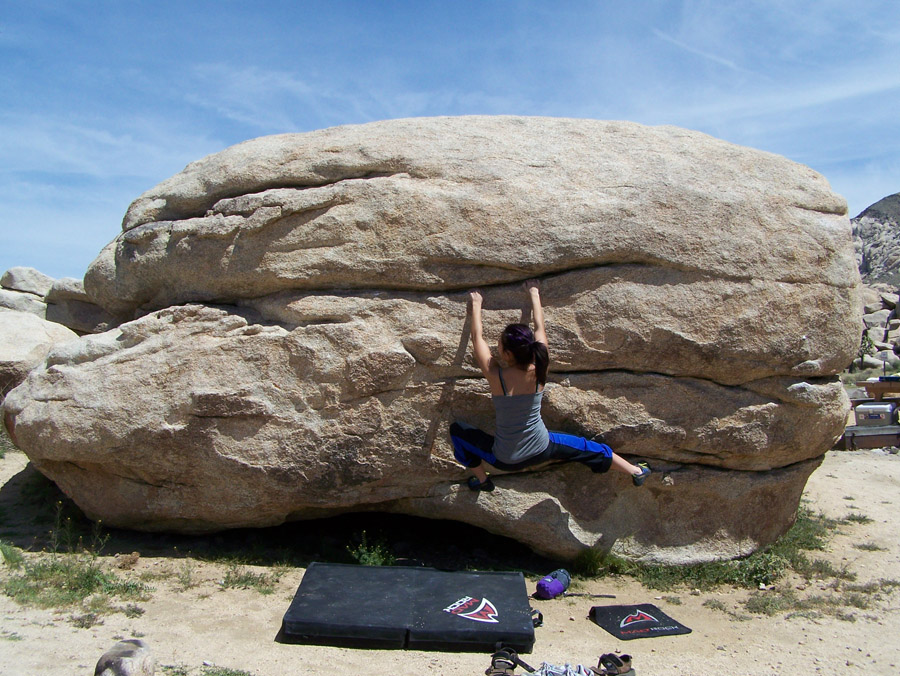
I'd Rather Be Listening to Your Instrumentals V0+

This is a route I looked at when Colin and I were here before. It's on the backside of the boulder with Let's Get It. It starts as a traverse to the left, followed by a heel hook and crux move up to the top of the rock. It's a tough reach but very possible. There's also a variation that goes all the way around the left end of the rock before topping out. We were unable to finish the variation, but here's a picture of me trying:
Jeeya!! V0+

This problem is a good one, but a bit insecure. The first couple moves up to the sloper are easily mastered. The crux follows, a tedious traverse at bad footholds to the crack on the far right. Once you've matched on the crack, pull up to the final shelf and mantle.
The Desperate Thing You Made Me Do VB

This would turn out to be Rafaela's first successful boulder problem. The route is very featured and not terribly tall. It's in the vicinity of the Wonderland of Rocks.
You and Me and the Moon V0-

This route is on the back of the boulder that has a number of very difficult routes. In fact, this is the downclimb. Nothing Special.
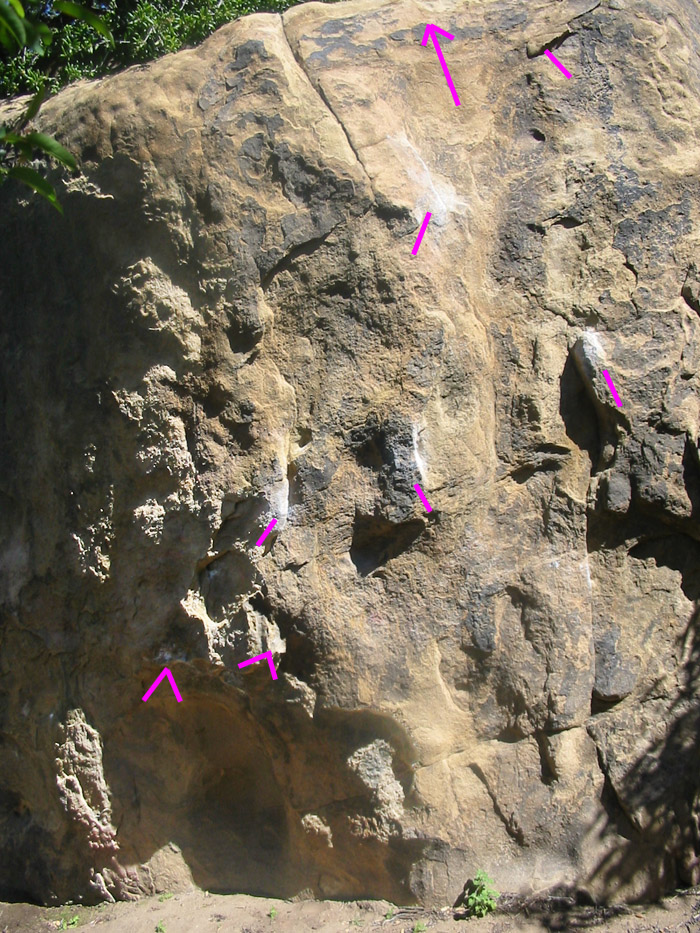
Smoke and Mirrors Project ??
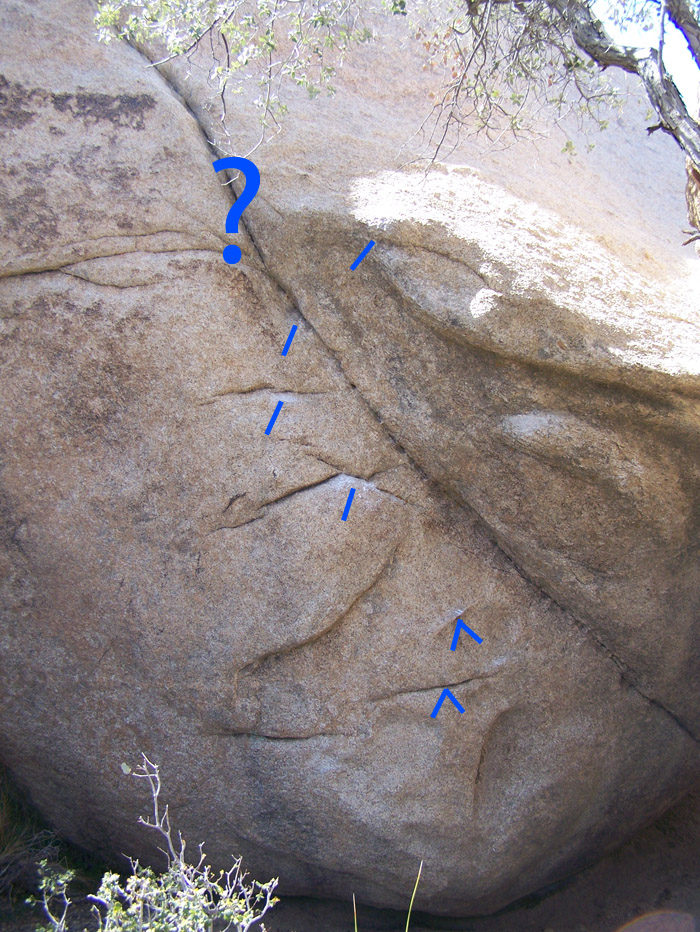
This problem is another that nobody had ever touched before. However, it turned out to be so chossy that I now question the amount of time I spent on it. I might go back and send it just because it bugged me so much that I couldn't make it past the bald sloper near the top. The real problem on this route is the lack of footing toward the left where your body eventually goes as you climb.
Update at The Arc: The Three V3s and a silly V4
Back at the Arc, I began working more with Ivan and progress was rapid. I climbed my first legitimate V3 on April 13th, which was a largely solo effort on a Sunday morning by myself. The picture I have of the route is horrible, but hopefully it can give a sense of the climb:
The start involves a nice big foot hold on the left and a crappy slopey hold (#1) for the hands. It's a loooong lift up to a nice right hand pinch (#2) with a great lip. The next move is a throw to a jug (#3) which you can let your feet fly off on, since it's such a good hold. Once on #3, you reposition your left leg on the starting hold and make a move up to #4 with your right hand. This hold is pretty poor, and the next couple of moves are the crux of the route. My method was to rotate my body and flag my left leg before hopping my right hand further, onto #5, another poor, slopey edge. From this position, I would tenuously move my left hand onto #4. Using the strength on these two hand holds, I would readjust my feet, and try to get my right foot on to the upper foothold on the other wall. This would give me the balance I needed to make the hand move up to #6, which was a decent three-finger pocket. If I got the pocket, I could easily finish up to #7 and the top of the wall.
The second V3 that I redpointed was substantially more difficult. It is the longest route that I have climbed at the Arc, and also has the most difficult moves in sequence. There is no good chance for rest on it:

The start involves two tiny crimpers (#1's) which you have to use to get to the brutally distant #2, which is a triangular hold that you can get a lot of thumb-purchase on. Once you get your left hand onto #2, you have to do a hand switch to your right hand, then rotate your body. My method for getting to #3 is to put my left hand on the + foothold to the left of the starting holds and left my left leg up to the left starting hold. From this point I make a massive move up to #3. A hand switch is needed on #3 before making the move to #4. #4 is a horrible three finger pocket, which you have to do another hand-switch on. This is a very tenuous move. My method is to crimp my left hand on the lip of the hold when i first reach it so that I can easily put my right hand's fingers into the pocket when it's time for the switch. The next move is to the holds at #5. These are both pretty poor, and by this time I am quite tired. The move up to #6 is the real crux. It is the worst hold on the route, and it is all you have to get yourself up to #7 and finish the route. I fell from this spot at least 5 or 6 times before finishing the route. When I had completed it, I knew it was my greatest climb thus far.
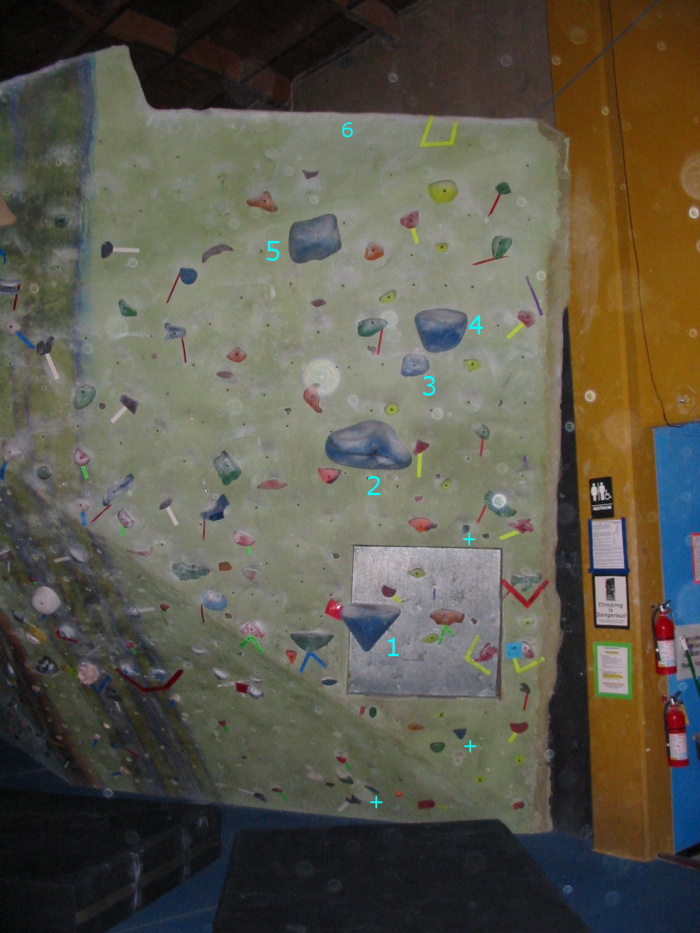
The third V3 that I intended to climb is called 'The Path Less Traveled' and it is easier than the Blue V3. In spite of that, I was unable to link it, although I did manage to climb all of the moves before my finger ligaments put an end to my hard climbing for early 2008. Here's the Path:

This route had a very interesting sequence at the start that I managed to reduce to only four moves. The left starting hold is a crimper and the right one is a small pocket. From here, the first move is up to a solid hold at #2. At this point, some fancy footwork is needed to pull up to the roof cling #3, which requires precise body positioning to use. From here, I used my strength to skip the poor hold at #4 with my right hand and grab #5. After grabbing #5, I readjusted my feet and grab #4 with the left hand. At this point, the only foot that can be reached is the right starting hold, which I put my right foot on, barely. The next move is the crux of the route, full dyno to a left hand sloper hold at #6. The move requires a hard pull with the right arm on #5 and a push from the right leg. I was able to nail this move about ten times, but staying on #6 without falling off when moving to #7 was something I only managed once. Once #7 has been reached, the next move is a right hand grab to a three finger pocket at #7.5. This move is the final crux, which is only really difficult because of tiredness. Hold #8 is also pretty poor, but the move is to quickly pass it and grab the top of the wall.
Another route that I managed to complete in this time frame was a slopey V4. This does not count as a legitimate send, however, because I used a dyno to skip the crux in a way that I do not think was intended. Here's the route:
The way that I was able to reliably climb the route was by making the big sloper move from #1 to #2 with the right hand, and then crimbing hard on a lip on #3. With my left foot on #1 and my right foot up on the foothold to the right, I would dyno all the way from #3 to the top of the wall. Its an exhilerating move, but obviously not the intended path...
During my climbing down-time, I still visited the arc and worked on my thumb strength and balance. I also began to focus on training my core muscles. I did not enjoy being unable to climb, but I knew that continuing through the pain might cause a more long-term issue, so I let it go. One chance I did have for some light outdoor climbing was on my third visit to Mexico with Jared. Here's the main route from that trip:
Baja Wash V0

Before Ivan left in late Summer, I began to climb a bit harder again at the Arc. My fingers were still in poor shape, however, so I only climbed hard once or at most twice per week. The route that had the primary focus was a black V4 with orange tape on the left wall just before the overhanging section. The start was very tenuous, balancy and required flexibility. The moves were very odd, but enjoyable. About midway up the wall, you had to make a serious throw to a knob. Once you had the knob, you had to readjust your feet and make a long move to the angled wall on the right, where a miserable hold was. Once you had this awful pinch, you had to do a pullup, with no help from your legs, and settle your foot onto a hold a bit too high to be comfortable. From this position, you make the final move to the top, which I could never stick, even though I got my fingertips around the top a few times. In the end, the route was taken down before I could finish it. Ivan, in all his lankiness, topped it a couple of times :-)
After Ivan left, I slowly started to recover to the point where I felt climbing hard, with taped fingers, could be managed. I knew that my fingers were not fully recovered, and that the issues would persist since I was not resting, but I was sick of half-ass days and felt that I could keep myself in check by avoiding crimpy routes as much as possible. The first route that I began to work on was a Yellow V3+ on the overhang part of the left wall. It begins with a traverse underneath the overhang, which finishes with a long move to a juggy sloper that many achieved statically with a heel-hook, but I typically did with a dynamic throw. Once on the juggy sloper, you had to negotiate your left foot onto a poor jib, and heel hook your right foot to the far right. The next move is a beautiful throw up to the crux hold. I would typically stick it with my right hand and then either fall off trying to bring my left up, or make the left hand and fall off attempting the finishing move. The final move required you to bring your feet up on top of the juggy sloper, which was too high and pulled you off the wall. The first time I nailed the finish I did put my foot on the juggy sloper, but in subsequent sends, and my first redpoint, I made the final move without feet, which is a wonderful apey feeling.
I worked the route for at least a month before my redpoint. My first send of the route was done on October 12th, the very first time I put on a pair of brand new 5.10 Gambits that I purchased at REI. These shoes fit my feet far better than the old-school Diablos that I had been wearing, and helped prevent the pain during the big heel-hooking move. This route became my second landmark route of the season, the first being the long Blue V3. After climbing it I felt wonderful, and knew that with the aid of the new shoes, I'd likely pick out a V4 project to work on. Unlike the previous landmark route, I wasn't worn out upon this success, and instead, I launched into a two-month stretch that would carry me to heights I never expected in my first full season.
After the V3+, I scouted the gym for a plausible V4. I'm not sure exactly how, but I ended up gravitating toward one composed of real rocks on the far right end of the overhang wall, where it's barely more than vertical. At first, every move was beyond my capability. The starting hold was actually a wood block, with almost no purchase, and I put off all attempts on it, favoring the middle section. For most people, the absolute crux of the route is about the third move. From a left hand sloper and a right hand fat semi-pinch, you must find a way to grab a distant slopey rock, straight above, with the right hand. At first the target hold seems awful, but eventually you realized there's a tiny lip on the top, and although the first stab at it will likely be open-handed due to the distance, you can quickly setup a crimp on top that yields a surprising amount of purchase. Then, the ensuing full-extension pullup requires you to use your long muscles, and finish with a snag to the next left-hand hold. With my long reach, the move can be done directly and controlled, however most others were forced to make additional foot moves, increasing the awkwardness and difficulty. The rest of the route is straightforward alternating hand holds, all terrible and in league with each other. The route is wonderfully consistent in its difficulty, and requires more stanima than my previous sends, totalling about seven consecutive hard moves.
I spent about three or four weeks trying this route. I rarely gave it full effort since it had a habit of wrecking my fingers. On the day that I finally climbed it, my foot hit the mat when I took it off the starting foothold, so I spent the rest of the day trying to repeat, and eventually succeeded. 'Twas quite a celebration to have finally climbed a V4. That was November 4th, the day before my birthday. One of the major reasons that my climbing was improving so quickly at this point was because I had begun to focus on losing weight. Over the two months leading up to the end of the season, I would go from about 185 to as low as 171. After climbing the real rock V4, I became somewhat convinced that it had only happened because it was one of the easier V4's in the gym. This turned out not to be the case. Within the next two weeks I would climb my second and third V4's, and both of them turned out to be easier for me. Unfortunately, I never captured pictures of these routes, but Colin took a pic of another route, which although not terribly difficult, may be the most enjoyable route I've ever done at the Arc. It's approximately V3/3+, solely for the dyno finish. The rest of the route is V2/2+ once you work out the sequence of heel-hooks. Essentially the route climbs an arete with big orange-slice holds on either side. Just about every move involves a heel-hook and a side-pull. The finish is a massive dyno to the top ledge. Here's a look:
During this two month period, I had been spending money wantonly on a set of cams and nuts to start trad climbing. On November 8th, we finally got a chance to head out to Joshua Tree and cut our teeth at Quail Springs. After spending quite a while top-roping a very easy route, I felt confident attempting my first lead. The route was called B-2 and it's rating is 5.3. Here's a shot of me on this historic first lead ;-):

The route was perfect for its purpose and I felt comfortable while climbing and placing pro. These elements unique to trad climbing emphasize technical skill, patience, mental fortitude and planning. While I had never expected it before, it turns out that I enjoy all of these far more than I expected, and feel that trad climbing will certainly become my primary mode of outdoor climbing. One of the other nice aspects of trad is that since it's more technical, it requires you to start on much easier routes, and therefor my fingers do not get nearly as stressed, which allows it to better compliment the more aggressive indoor climbing that I do.
Over the course of the next month or so, we managed to make three trips to Joshua Tree, and we climbed about fifteen trad routes. Two of the most enjoyable were Fote Hog (5.6 2-pitch) and Scrumdillyishus (5.7). Here they are:
Fote Hog 5.6 2 pitch

Scrumdillyishus 5.7
Fote Hog was likely my favorite outdoor climb of the season. It has so many different types of climbing on it! At first, it's an easy scramble up to a tree, followed by sparse face climbing and a thrilling traverse, where you have just enough holds to eek it out. The most exhilerating part is the crux overhang, where you hang on to some powdered jugs until you work up enough guts to grasp the plates above and pull over the roof. After the plates, you set up a belay for the second. After this, there's a fun, short layback dihedral leading up to a short finger-crack and then a longer layback dihedral followed by easy climbing to the finish.
Scrumdillyishus is a long route following a crack, with TONS of features and opportunities for protection. It's simply an amazing and straightforward climb, with solid, quality rock and plenty of it.
A Fitting Finish at the Arc
We left Joshua Tree on November 30th just after we finished Scrumdillyishus in the morning. On the way home, I suggested we stop over at the Arc since I felt good and knew I'd be super lightweight from the camping and ready to tackle a hard problem. I had no idea how well it would actually go. After arriving at the Arc, I absent-mindedly forgot to tape my fingers. Also, since we wanted to only stop briefly, I only grabbed my Gambits, and didn't put on my Diablos as I typically did. After a couple short warm up climbs, I realized that I felt amazing, and decided to take a look at the short, easy, Black V5 in the corner of the overhang wall that I knew was the easiest V5 in the place. In only a couple of tries, I sent it. I was extremely excited, but I never considered it a legitimate V5 since it only has a couple of hard moves (barely V4+ difficulty if that) followed by V2+ climbing. Nevertheless, I was excited. Before leaving, I also decided to take a look at the green super-slopey route on the very back of the overhang wall, where it's near-vertical again. After a couple of tries, and using a new strategy on the crux, I decided that I was near to sending it. I gave it a serious attempt and nearly nailed the crux. I decided to rest for 5 or 10 minutes and put it away, which I did! Since it was unmarked, I asked the guy working the desk to inform me of the rating. He estimated V5/5+. This route, being suited to my strengths, was not downgraded in my mind, and I consider this my first V5, a level which I never expected to reach in my first season. Unfortunately, I don't have a picture of this route, but I can give a description of it.
The start is low and to the right of the near-vertical rear face of the overhang wall. The first move from the sit-start is a tenous reach left to a sloper from a match on a broad neck-level hold. This move had originally defeated me, but a fellow climber tought me how to do it a few weeks prior. Once on the first massive sloper, deft footwork was needed to allow a match and then an aggressive foot move to get the right foot on top of the starting hold. This set you up for the move to the top-right toward another massive, flat-topped green sloper which you can actually see on the bottom left of the Orange Slice photo above. Once you steadied yourself on this hold, you need to match and reposition your feet, this time aggressively putting your left foot on the large sloper you just left. The next move is to a third massive sloper which actually has some purchase on the left side of the top. In fact, I was able to get a very powerful grip on it with a well-set crimp. Again, you need to match on this sloper and work your feet to prepare for the crux. The right foot moves up onto the flat-topped sloper from the photo. This crux move is very tenuous and involves the worst hold I've ever utilitized in a climb. You must steadily transfer your weight from the left to the right, and deliberately stand on the right foot. The nature of the wall will eventually cause you to fall away as you rise. Before this happens to any significant degree, you must put your right hand on the awful hold above and to the right, which can be seen on the left side of the orange sloper picture next to an orange hold. The orientation of your hand is vital: thumb up and on top, with the four fingers underneath the insubstantial bottom edge of the hold, pressing into the crease. With any luck, this tiny amount of purchase will allow you a brief moment to finish your rise and dynamically slap for the final sloper, which isn't as bad as the previous ones. Thanks to my long reach and big hands, I was able to make this final snag without terrible difficulty, even though I had seen one of the best climbers at the Arc, a much shorter person, fall off. After reaching this final sloper, the finishing move is easy.
My success at the Arc on my final day there of the season was unanticipated, and I believe it can be ascribed to three things. First, I weighted only about 171 pounds, my lightest of the season. Second, I neglected to tape my fingers, allowing me additional contact strength. Finally, having just returned from a refreshing and successful visit to Joshua Tree, I was in the proper mindset to make a stab at progress. This day singlehandedly made up for the setbacks of the first season and has greatly increased my enthusiasm for next year.
On the last day of climbing before break, I went to Stoney Point and redpointed a difficult V2 on Turlock called the Corner. It had several nasty holds, a difficult match, and a heel-hook. In addition, it was somewhat high-ball and I had to keep my nerves on the finish. I would compare its difficulty to maybe a V3+ at the Arc.
Return to Index
Forward to Season 2
Page from College